Monday 24 February 2014

Coffee Meringue Biscuits - Simple, Tasty, Gluten Free


I decided to create a little meringue biscuit inspired by Nigella Lawson's Cappuccino Pavlova with a Vintage Movement twist - which basically means using easy to find pantry ingredients... I'm not one of those people who loves grocery shopping at the best of times so it has to be easy and on hand!.

These little meringue cookies are a great dessert, afternoon tea or special occasion offering and require egg whites, sugar, instant coffee granules (Espresso powder is best but can be hard to find), pinch salt, cocoa, vanilla extract and a touch of warm water.

For this recipe I used 
3 egg whites at room temperature
1 & 1/4 cups sugar ( I used raw caster sugar)
Pinch salt
1.5 tsp approx instant coffee granules ( Espresso powder if available 1 tsp ish)
2 tsp dutch cocoa (I love the strong flavour.. you can use any kind of cocoa you have available)
Piping bag fitted with a round tipped nozzle (optional you can also spoon the mix onto the bakers paper)
1 tsp vanilla extract (essence is also fine and vanilla pods are great)

Preheat your oven to 110 deg. Celsius

1.Separate your egg whites and transfer to your clean and dry mixing bowl then beat till just frothy and add a pinch of salt and continue mixing. 
2. Once the mix hits the soft peak stage start adding your sugar 1 tablespoon at a time
3. While the meringue is still mixing make a thick but smooth liquid like paste with your coffee granules and a tiny bit of warm water... you are looking for dissolved granules with a shiny melted chocolate like consistency. The reason you don't want to add too much water is that it will collapse your meringue peaks.
4. Add 2 tsps cocoa and 1 tsp of the coffee paste and the vanilla. I added a bit more of the coffee paste to the mix for my batch so add a little more if you prefer a stronger flavour. Espresso power is perfect for this recipe if you have it available - no need to add the water with this powder you just add about half to one teaspoon. If you want to taste the mix before finishing you could heat a pan and pop a little in then once cooked through taste and adjust cocoa and coffee to taste. 
5. Fill your piping bag with the mixture and pipe rounds to your desired size on a lined baking sheet (I piped 2 inch rounds and got about 15-20 from this batch). They spread a bit so its best to leave space between. 
6. Place on the bottom shelf in the oven and cook for approx 30 mins depending on your oven. I took mine out when they no longer wiggled on the baking paper.

Using the yolks
A great way to use the left over egg yolks is to make custard to serve with the biscuits... I decided to add a bit of Kahlua and a bit of the left over coffee paste to my custard.
To make simply take a bowl and place the 3 yolks, 1/8 -1/4 cup sugar (depending on how sweet you like it), 1 tbsp custard powder and mix. Then in a separate pan heat 1 cup milk and 1 vanilla pod (or 2 tsp vanilla extract) till hot. When the milk is hot add it to the bowl housing the egg/sugar mixture (vanilla pod excluded) and whisk well then return it all to the pan and whisk continually over the stove till the mixture thickens. Add 1 tsp of Kahlua and half tsp of coffee paste to taste (feel free to add more if you like, from memory I did)... you can also add a few tablespoons of cream for a richer taste. Serve the custard with the meringue biscuits and a small dollop of cream... this is basically my play on the age old Eton Mess. This makes about 1-1.5 cups of custard.


 Yes there were air pockets and cracks but they tasted great just the same!. If you want avoid the cracks on top leave the piped mixture to form a skin before baking just like you do before baking macrons.


xx

Friday 21 February 2014

Vintage Module Leather Chair - Danish Inspired Australian Made

I've blogged about many a vintage find in this space but this one is a super special post... I'm a self confessed shopaholic, so buying second hand not only means I can do my part for the environment but I can also feed my habit without plunging into financial ruin!.

This year I decided it was time to trade in my replicas for some aged, supple leather goodness and started to hunt around vintage boutiques and websites... I soon realised I'd be saving my pennies for a while and happened to stumbled across this sweet little duo in need of a new home. Made in Melbourne in the 70's this Scandinavian inspired swivel chair and ottoman are very welcome in my home. I know the whole 70's retro aesthetic isn't for everyone but it sure is for me!.


Wednesday 12 February 2014

Vintage Leather Sling Chair & Retro Tapestry Macrame Wall Hanging


Thought I'd share some vintage treasure today. I love a bargain vintage buy and both of these items fit the bill... the leather sling back chair is one of a pair, purchased on Ebay for $20 each!! They are super comfy and while the legs need a little TLC - also known as rust remover, they are one of my favourite vintage buys to date. This was such a lucky find, the couple selling these chairs were heading overseas and clearing out their bulky items... they had purchased these chairs from a vintage boutique a few years prior which I'd say means they were definitely not $20 each at the time of purchase ;-).


The retro wall hanging was a Vinnies bargain at $3! Mum pointed it out as we perused the shelves and I'm loving the geo /aztec/ navajo inspired design. Not sure if it's classed as macrame, embroidery or weaving but I'm thrilled to add it to my collection. We were quite a way from the city when we spotted this gem hence the bargain and the find itself... doubt it would have lasted more then a minute in the inner city op shops.


Industrial letter 'S' - purchased at a roadside market in Paris

Friday 7 February 2014

Valentines Day Heart Healthy Sweet Treat - Three Ingredients!!

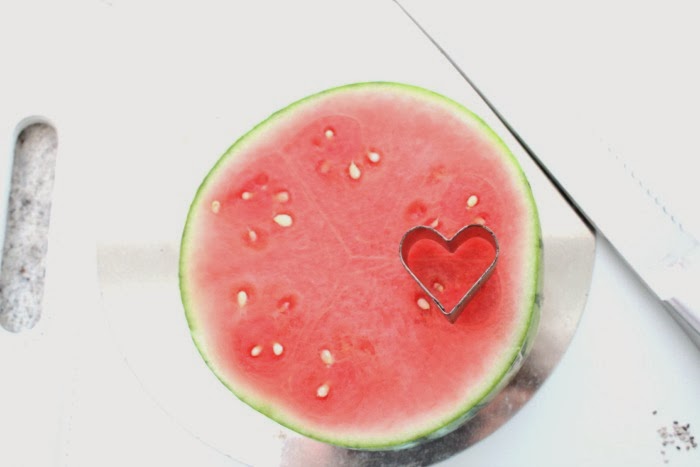
Here's a super healthy and simple sweet treat to kick start your Valentines Day menu. It takes about five minutes to assemble and only requires some watermelon, yogurt, chia seeds and a heart shaped cookie cutter.

To make simply cut a slice of watermelon about an inch thick, cut out your heart shapes, spoon some yogurt on top and sprinkle with chia seeds... for a super cute cupids-bow-touch you can pierce your heart
shaped watermelon bites diagonally with a toothpick and adorn the tips with micro mint leaves. Simple as that!


xx

Saturday 1 February 2014

How To Make DIY Letterpress Art At Home - No Press Needed!

I love finding old letterpress/typography wood blocks at markets and op shops and today I wanted to share a fun and fashionable way to create letterpress style artworks at home without using a press!.


You will need:

Letters for stamping (I used vintage wood and metal printing blocks)
Paint in a variety of colours (I used basic acrylic paint)
Small stack of white paper
Frame (I used the Ikea Ribba frame)

1. Start by removing the mount from the frame and score your piece of paper using the inside edge of the mount as a guide
2. Arrange your letters within the scored window (you can also score around each block once your have organised your letter arrangement)
3. Choose your colours
4. Paint your letter and stamp it facing down (you may want to practice on a spare piece of paper first) I found it worked best stamping with a number of sheets beneath your piece of paper... It allowed the letter to have some cushioning while stamping which gave a better finish.
5. Leave to dry completely and then place in your frame


xx

I know I'm like the last person to join but Vintage Movement is now finally on Instagram - here

Happy weekend to all