Monday, 24 September 2012

Strawberry Cupcake Butterflies - easiest cupcake garnish in the world!!!!

August/September is Birthday season in my family with 7 in 7 weeks - ridiculous! 
For my sister's birthday I made a round of vanilla cupcakes and decided to decorate the cakes with strawberry butterflies ... I have to say this is the easiest and cutest way to decorate a cupcake using household ingredients!.


Slice your strawberries as you would to make a fan but actually cut through to make individual slices. Then take one of those strawberry slices, halve it and then lay it out on the cupcake as shown above. Now simply cut a small strip of strawberry for the center, place it between the two slices and voila! 


Wednesday, 19 September 2012

DIY Map Projects - Re purposing vintage maps for home decoration

Everyone has an old street directory or vintage atlas lying around the house and these DIY craft ideas will have you transforming them into one off works of art that cost next to nothing and look amazing! Re purposing maps are a great way to display your favourite destinations in style... maybe you have a crumpled map lying around from that trip to Paris or an old map of your family's country of origin - these simple to-do's will have you displaying them with pride!.

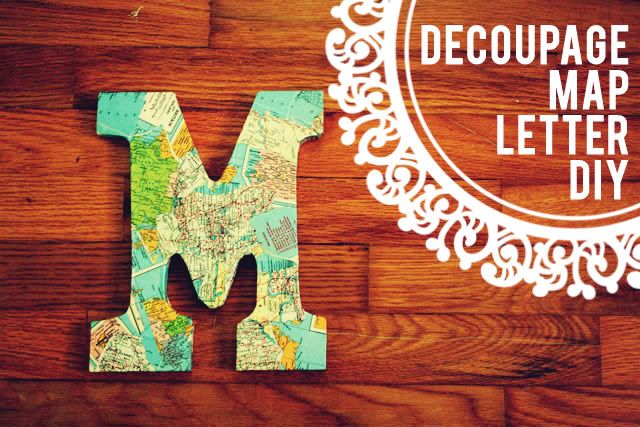
decoupaged map letter DIY title

All you need for this task is glue, maps and a letter - finishing with a coat of varnish would also look great.
DIY found here (jessica chronical)

maps in hoops Map It: DIY It

Image only found rowhousenest

All you need are maps and embroidery hoops.. you could also use maps printed on tea towels for this project

here is a great embroidery hoop DIY how to by the the curiosity box


 found here
with the festive season around the corner this gift wrap inspiration is certainly on my list of things to do!

Vintage map coasters
The clever cats at Martha Stewart created this DIY

Map heart artwork - you will need maps cuts into heart shapes, frame and a piece of white card board.
Found here

vintage map covered cardboard deer head by the awesome steph goralnick by laverne

Not for the faint hearted this découpage cardboard stag head is marvellous!  
world map covered stag head
Steph Goralnick


Found here
 This is slightly ambitious but a statement non the less! Map wallpaper


Tuesday, 11 September 2012

Yarn Bombing - nanna's knitting needles meets street art magic!

I LOVE that yarn bombing aka yarn storming is the new graffiti! This brilliant street art trend, sweeping the globe, involves knit-wrapping anything from trees to lamp posts and buses! 

Following the resurrection of knitting and crocheting this cool new craft is one of those feel good contributions to the arts, even if it there is an air of naughtiness... dare you not to smile the next time you stumble across a yarn bombed piece of public property.... it's like Nana wrapping you in a cosy warm blanket for the night - lovely!


Groups such as Knit The City  - a collective of knitter's regularly Yarn Storm the city of London.

yarn bombing


Yarn Bombing 


Wednesday, 5 September 2012

DIY Party or Wedding Decoration - Tissue Flower Pom Pom Vines

I found this stunning tutorial on oncewed and had to share... for those who love Martha Stewart's Tissue Pom Poms  you will LOVE this simple take on this classic party decoration that will delight your guests and suit all occasions from casual tea parties to weddings, christenings, birthdays and beyond....

0909_1

0909_2

0909_3


Supplies
1. cutting mat, 2. twine, 3. craft paper, 4. assorted tissue paper, 5. scissors, 6. floral wire

0909_4

Directions
To create the tissue paper pom poms:
Accordion fold 7 sheets of tissue paper together with 7 folds, each about 1 inch wide. Find the center of the stack and wrap floral wire around the center to create a divide. Fan out each side of the tissue paper and carefully pull out each layer of paper until you have a ball.

0909_5

0909_6

To create the leaves:
Cut craft paper into a silhouette of a figure 8 and make a fold in the center where the leaves meet. Using a craft knife or scissors make a small “x” incision into the center of the crease to create a hole to pull the twine through. Next, fold a crease through both leaves to give your shape some character.

0909_9

Images and Instructions courtesy of once wed

Tuesday, 4 September 2012

Foo Dogs - Fu or foo these dogs are my fave!

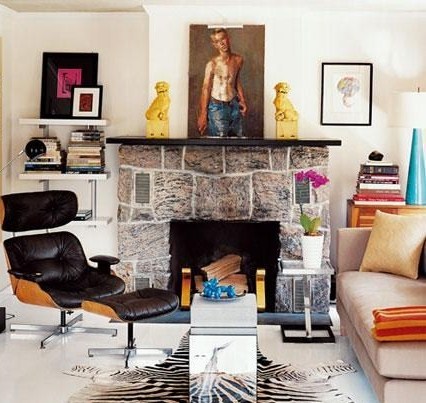
I have been looking for a mid century pair of Turquoise Foo Dogs for while and I am yet to find the perfect pair... I've found quite a few reproductions on Ebay but I'm really looking for a vintage pair with great detail.... Any Hollywood Regency fan will probably already have a pair adorning their coffee table or shelf - here are some examples I am LOVING!


My sister has the above larger foo dog sitting in her veggie patch!!!!