Showing posts with label Food. Show all posts

Wednesday, 18 December 2013

Simple Meringue Christmas Trees


Here's a fun dessert idea that will delight your Christmas day guests and relatives. My Christmas Tree Meringues or Pavlovas (as we call them here) are a lovely light way to finish a meal served with whipped cream and berries on the side.  

Preparing your meringue mix
Earlier in the year I shared my Meringue recipe and I simply halved the amount of egg white to 4 eggs and used 1.5 cups of sugar. Ideally a stand mixer is the easiest way to achieve a stiff peaked and smooth meringue mix but you can also use hand held beaters to achieve the same (4 egg whites approx 120 grams of white to 1.5 cups caster sugar).
Meringue making tips
 Make sure your bowl is clean, your egg whites are at room temperature and when ready only add the sugar one tablespoon at a time and whip till the mix is at stiff peaks and the sugar is dissolved (rub a small amount between your thumb and forefinger). Also bake on the lowest shelf in your oven and at a very low 110 degrees C - I think that's about 230 degrees F for 40 minutes or until sufficiently dried out. This makes approx. 20 meringue trees. I also like to add a pinch of salt to the egg whites when I begin beating to stabilise.

Piping
1. When your meringue mix is ready take your piping nozzle I used Wilton 1A round nozzle and place it in your piping bag. Then fill with your meringue mix and you are ready to pipe your trees.

2. Hold your piping bag straight down on a lined tray and push the meringue out till you get a nice round shape then stop and pipe another round on top that is slightly smaller and repeat creating 5 or 6 levels to each tree and finish with a peak at the top. Make sure to leave more then an 1" between each meringue tree as they will spread slightly and increase in size as they bake.


 as you will see some of my trees sloped because I didn't pipe them straight enough, if you find your piped meringues are not sitting straight simply scrape them off the baking paper and re-pipe.

Decorating


You will need
-Fondant in the colour of your choice to create the stars
-Star or flower shaped cutter
-Edible baubles - you can use edible pearls, mini round candies, choc chips or rolled fondant balls.
-Glitter or shimmer powders (optional)
-A few pieces of white chocolate to stick the star and bauble to the trees

Directions
1. While your meringues are baking and then cooling start to cut your stars using a flower or start shaped mini cutter. I then chose to paint my stars with edible silver powder and edible glitter. 

2. Once your meringues are completely cool melt your white chocolate (you will only need a small amount of chocolate to decorate the trees I used a few pieces from a chocolate bar). Then apply a small amount to the star and attach it gently to the meringue peak. Once that is set start adding the round candy baubles and that is it!


xx

Friday, 13 December 2013

Miss Chu Inspired Summer Party Coconut Cocktail Loveliness!

For my birthday this year my husband and I popped into Miss Chu in South Yarra for lunch. Serving tasty Vietnamese street food in an uber cool setting, this place is definitely worth visiting.

I was drawn to the place after seeing the owner and founder interviewed. I thought she was amazing - savvy, generous, feisty and totally inspiring and after our visit I have to say lunch, dinner or snacks at Miss Chu is a real treat from the senses...


At this time of year I start thinking about my festive season cooking and given the weather here in Australia I always like to mix up a chilled cocktail or two for guests. This reminded me of Miss Chu's Young Coconut slushies served with or without vodka... they are absolutely delicious and would make the perfect summer festive season offering.

I remember Mum and Dad buying "baby coconuts" and drinking the milk straight from the fruit "resort style" and at that time I wasn't too fussed by the taste but now I've grown to love the subtle nutty flavour. With all of that in mind I was delighted to find frozen young coconut drinks at my local Korean Supermarket and set about recreating the young coconut & cucumber slushies we enjoyed back in August. 


Here is my simple Miss Chu inspired Coconut Slushy Recipe:
Serves 2
2 x young coconut frozen drinks
1/2 lime 
3" long cut of cucumber
For the spiked version add 40mls-50mls of vodka or coconut rum
You will also need a blender or food processor to create your slushy

Allow your coconut drinks to defrost a little bit so they can be processed with ease. Place in a blender with the lime juice and cut cucumber skin on. Then simple pulse and you are done... for the cocktail version add your spirits and pulse again for a few seconds - serve immediately.

This is the packaging you will find in your local Asian Supermarket... check out the freezer section.


xx

Monday, 25 November 2013

Super Simple & Fun Tropical Themed Gingerbread Cookies


With Christmas just 29 days away I have started baking cookies with a dash of cinnamon and ginger filling the house with the aromas of the festive season. 

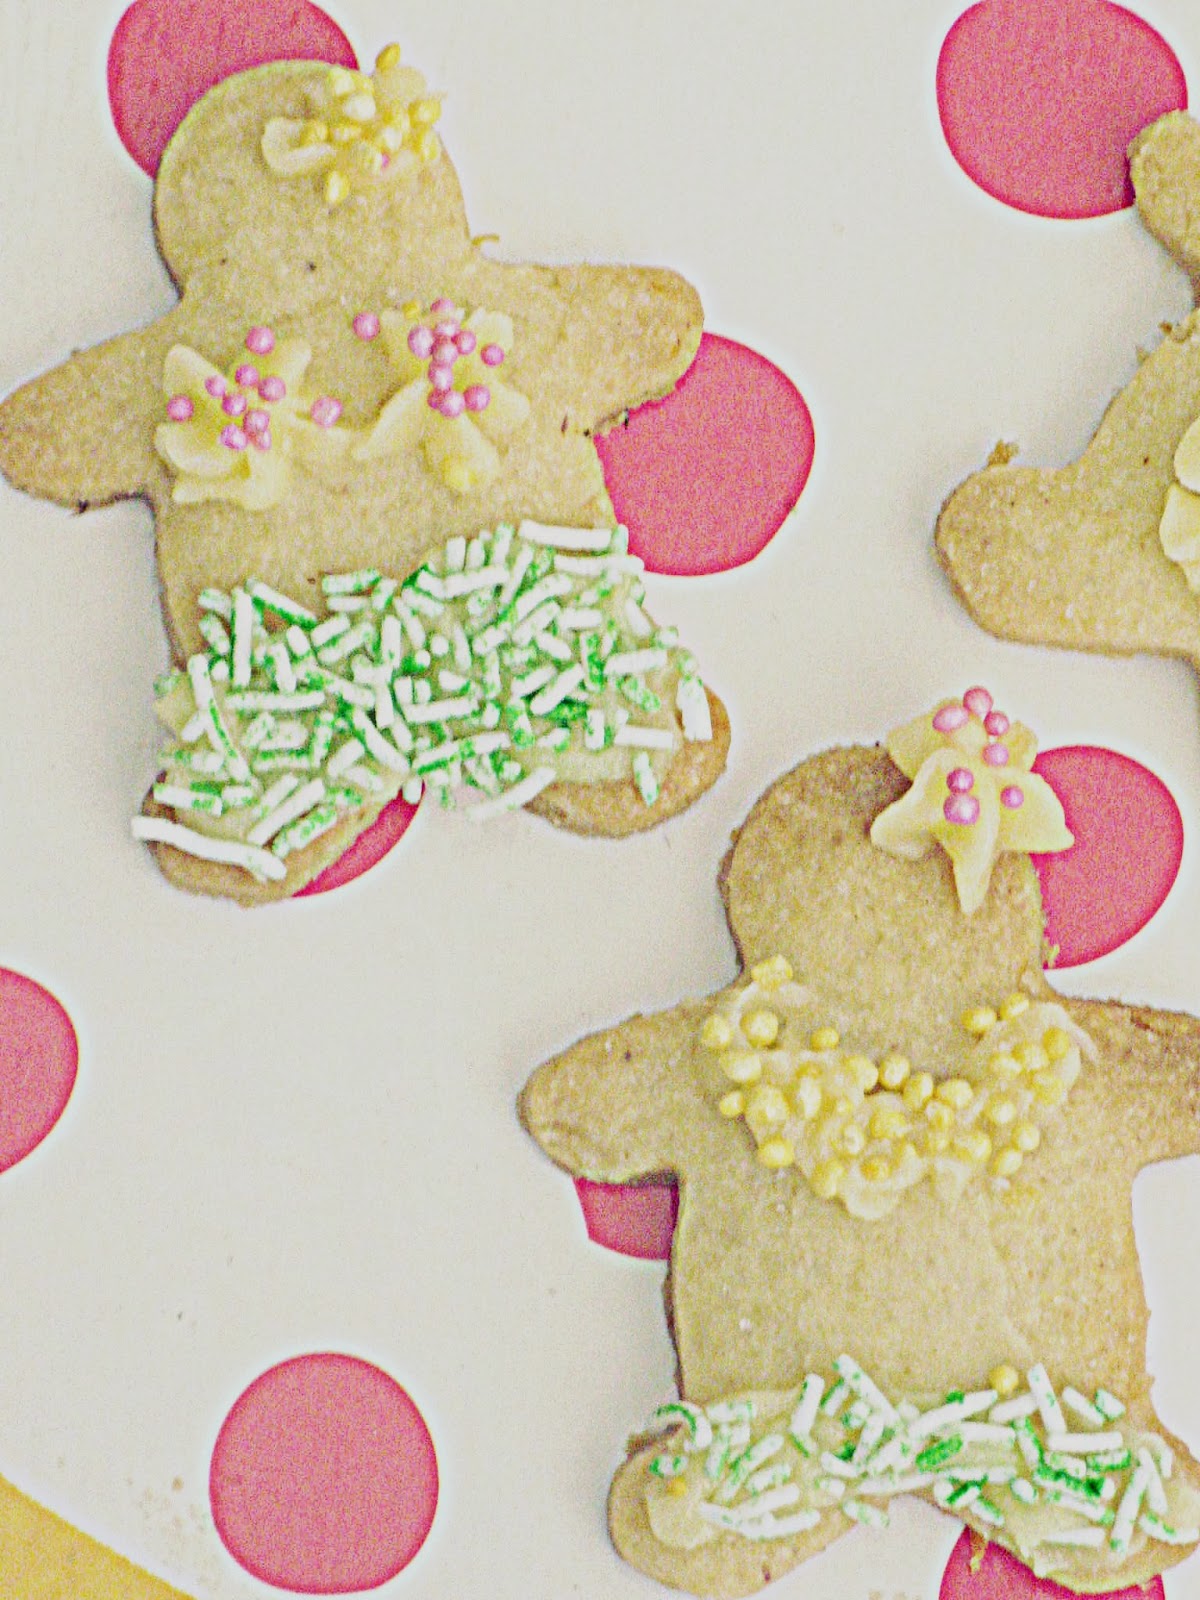
I'm having my nephews over this afternoon and wanted to surprise them with a sweet homemade treat so I whipped up a batch of "Gingerbread a la Tina", thawed out some left over frozen butter cream and got to decorating my tropical holiday themed gingerbread cookies - fitting for the start of summer here in Australia!.

To replicate this super simple look all you need is baked gingerbread biscuits, butter cream (1:2 ratio butter to icing sugar, dash of vanilla extract, dash of cream or milk to bring it together), Star tipped piping nozzle, and a packet of sprinkles.


place your butter cream in a piping bag fitted with your nozzle, then lay out the biscuits and start piping the flowers. You can practice using a piece of baking paper first till you achieve the desired look. Then top with sprinkles and that's it!.


I used a dash of green food colouring mixed with white sprinkles to create a grass skirt effect.


 xx

Saturday, 16 November 2013

Mexican Inspired Day Of The Dead Sugar Skull Cake Tutorial

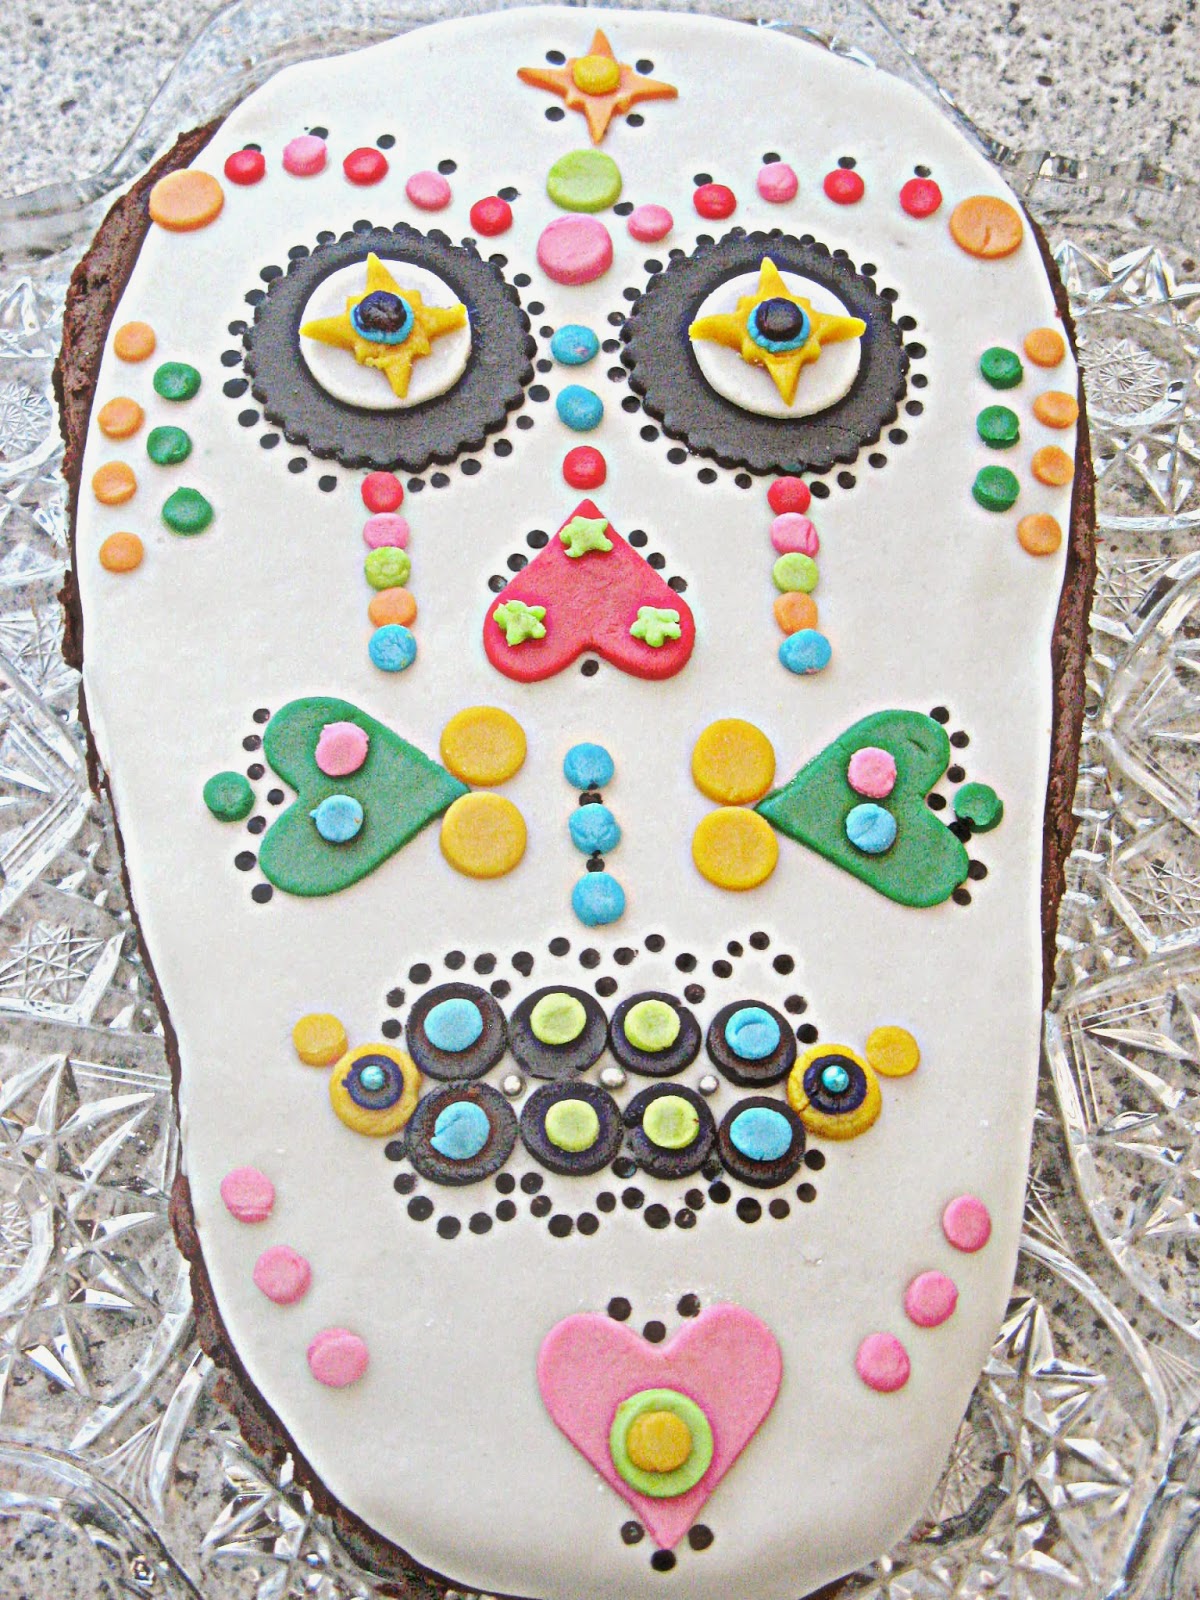
I know this post is a bit late in the making but I thought it worth sharing just the same. For Halloween this year I decided to make a Day of the Dead Sugar Skull Cake inspired by the well known Mexican celebration that runs from the 31st of October to the 2nd of November. The decorations used to commemorate this holiday are simply amazing and I wanted to try my hand at replicating a sugar skull in fondant.

To create this design I used cookie cutters and piping nozzles to shape the fondant. You can be as creative as you like with your shapes so don't despair if you don't have the shapes I have used just experiment with the mini cutters and piping nozzles you have at home. At the least you will need some circle cookie cutters large enough to create the eyes and also some small ones to create smaller dots for your design. I also used a heart shaped cutter for the nose and the smaller dots were created using Wilton No. 12 and 1A round piping nozzles.

You can also paint the design on using gel food colouring or you could pipe royal icing onto the cake to create the design.

For the cake component I made two 20cm round chocolate cakes. You will need the cakes to be the same height.


Tutorial

1. Shaping your cakes
Take your cakes and lay them out as seen in pic 1. (below) then start to carve them as seen in pic 2. you are aiming for as close to the shape in picture 3. and finish by covering the cake in either butter cream or ganache.

I used buttercream for this recipe
500grms icing sugar 
250g butter (softened)
1 tsp vanilla extract
cocoa to taste (for chocolate butter cream)
Pinch of salt (optional)
Mix well using an electric mixer - add a dash of cream, hot water or milk to incorporate if needed.


2.Fondant
I make my own fondant but you can use store bought varieties and simply colour them to suit your design. I add liquid or gel colour and mix it through white fondant till I achieve the desired colour.

3. Cutting Your Shapes 
Now you are ready to start cutting out your shapes and arranging your design. I cut a piece of kitchen towel to shape and laid the fondant pieces out before placing them on the cake, this way you can make changes as you go.


4.Covering the cake
Now its time to cover the cake in white fondant 
I'm a slap dash kind of baker so cut the white fondant without measuring it first... as a result the fondant didn't fit flush across the cake so I'd suggest tracing a template from baking paper cutting it out and then using it to size your fondant correctly.

5. Fixing your cut outs to the cake

First simply lay your entire design out on the cake before sticking it down to the fondant making sure everything looks balanced and is where you want it to be. Then you can start adhering the shapes to the cake by simply wetting the back the fondant pieces and placing them down on the cake.


To create the stamped ink dots I used gel colouring and the end of a chopstick


Sharing
Rooted in Thyme's Simple and Sweet Fridays - here


xx

Saturday, 19 October 2013

Simple Tangy White Chocolate Dipped Pretzel Recipe

This is one of those melt, mix and your done kind of recipes I devised a few weeks ago... With the holidays season just around the corner this sweet & tangy offering will hopefully have your guests begging for more!. Why tangy chocolate dipped pretzels, you ask? Well, my sister bought some yogurt dipped pretzels at Thomas Dux and I wanted to replicate the flavour at home... long story short I haven't perfected the yogurt coating but this simple recipe certainly takes your pretzels and white chocolate to a new and exciting place!.


All you need is
375g white melting chocolate (I used Nestle White Chocolate Melts)
200g bag of pretzels (I used Parkers)
1/4 tsp citric acid ( I used Mckenzies)

1.Melt your white chocolate according to packet instructions (I used a double boiler for this).
2.When the buttons melt add the citric acid and stir very well to combine.
3. Dip the pretzels in the melted chocolate mixture and leave to set on a piece of parchment paper
4. enjoy!


xx

Sharing at