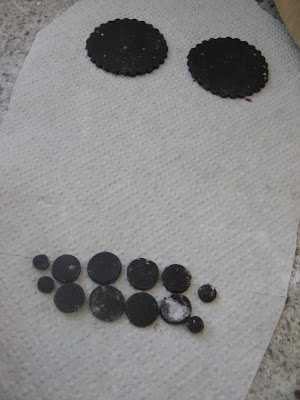
To create this design I used cookie cutters and piping nozzles to shape the fondant. You can be as creative as you like with your shapes so don't despair if you don't have the shapes I have used just experiment with the mini cutters and piping nozzles you have at home. At the least you will need some circle cookie cutters large enough to create the eyes and also some small ones to create smaller dots for your design. I also used a heart shaped cutter for the nose and the smaller dots were created using Wilton No. 12 and 1A round piping nozzles.
You can also paint the design on using gel food colouring or you could pipe royal icing onto the cake to create the design.
For the cake component I made two 20cm round chocolate cakes. You will need the cakes to be the same height.
Tutorial
1. Shaping your cakes
Take your cakes and lay them out as seen in pic 1. (below) then start to carve them as seen in pic 2. you are aiming for as close to the shape in picture 3. and finish by covering the cake in either butter cream or ganache.
I used buttercream for this recipe
500grms icing sugar
250g butter (softened)
1 tsp vanilla extract
cocoa to taste (for chocolate butter cream)
Pinch of salt (optional)
Mix well using an electric mixer - add a dash of cream, hot water or milk to incorporate if needed.
2.Fondant
I make my own fondant but you can use store bought varieties and simply colour them to suit your design. I add liquid or gel colour and mix it through white fondant till I achieve the desired colour.
3. Cutting Your Shapes
Now you are ready to start cutting out your shapes and arranging your design. I cut a piece of kitchen towel to shape and laid the fondant pieces out before placing them on the cake, this way you can make changes as you go.
4.Covering the cake
Now its time to cover the cake in white fondant
I'm a slap dash kind of baker so cut the white fondant without measuring it first... as a result the fondant didn't fit flush across the cake so I'd suggest tracing a template from baking paper cutting it out and then using it to size your fondant correctly.
5. Fixing your cut outs to the cake
First simply lay your entire design out on the cake before sticking it down to the fondant making sure everything looks balanced and is where you want it to be. Then you can start adhering the shapes to the cake by simply wetting the back the fondant pieces and placing them down on the cake.
To create the stamped ink dots I used gel colouring and the end of a chopstick
Sharing
Rooted in Thyme's Simple and Sweet Fridays - here
xx


Your cake is amazing! :)
ReplyDeleteThanks so much Mel :) xx
DeleteWow, that's impressive! So detailed and colourful, nice one :)
ReplyDeleteThanks you so much Natalie :) xx
Delete