Friday 28 March 2014

DIY Printed Fabric Using Potato Stamps

I desperately need new cushions but my newly found Danish Deluxe Kroken chairs have reduced my home decor budget to well, very little, at the moment... So I temporarily shelved my obsession with Bonnie and Neil's amazing range and set about trying to find a simple homemade alternative. When I spotted this super fab. potato stamp DIY project on pinterest I knew I had to give it a go. At this stage I've printed the fabric and will sew my covers very soon. Here's my super quick picture tutorial.


1.Simply carve your chosen stamp shape using half a potato
2. Using fabric paint stamp your design in straight lines 
3. Allow the paint to dry overnight then iron to fix using a hot iron without steam (follow the instructions supplied along with your fabric paint).


 xx

Wednesday 19 March 2014

Cinnamon Sugar Donut Recipe

Remember the early 90's, when people on health kicks ate muffins for lunch before we realised they were simply over sized cupcakes with a few sneaky oats and berries thrown on top!!.

Well, today I have a simple Donut making method to share with you... it's not a health snack, its never going to be but it sure looks pretty and it's fun to make!. 


I stumbled across this recipe on Instructables here and will definitely be trying this out for the dough base next time. However for the images included I used a local recipe... long story short it was a bit doughey and it didn't have enough flavour... it would have possibly made a good jam filled Donut base but I like the look of this instructables recipe by Scoochmaroo.

Donuts makes about 40 (scoochmaroo)
3 (1/4 ounce / 7g) packages yeast (3/4 oz / 21g total) - I used "Rapid Rise" but traditional is fine too - it just affects the rising times
1/2 cup (120ml) water  (105-115F / 40-46C)
1/4 cups (530ml) milk, scalded, then cooled
3/4 cup (169g) sugar
1 1/2 teaspoons salt
3 eggs
1/2 cup (113g) shortening
7 1/2 cups (940g) all-purpose flour
Vegetable oil for frying

Proof your yeast, scald the milk then let it cool (to kill the enzymes that deter your dough from rising) then add together with the rest of the ingredients with half the flour and beat on low for 30 seconds and then on medium for 2 mins. Then gently add the rest of the flour until smooth and leave the dough to rise for 60 mins.

Place the dough on a floured surface and gently roll out to 1/2 inch thick. Gather two round cutters as shown below in the pics. Cut out your shapes (don't forget to keep the inside holes for frying too!). Place donuts and holes on a tray and let rise again for about 30 mins.  

Mix your cinnamon sugar by adding 1-2 teaspoons of group cinnamon to 1/2 a cup of raw caster sugar (you can also use white caster). Then leave aside. You will need more then 1 or two times this amount but you can mix as you go and you can add as much cinnamon as you like.

When your donuts have rested start to heat your oil. Use a deep pan and enough oil to allow the donuts to float while cooking... you could probably also use a deep fryer if on hand. You need to add the donuts to hot ready to fry oil approx (180 deg celsius). Please be very careful while handling the oil and frying the donuts. Fry each donut for about 1 min each side then place on paper towel. 
Then shake and gently shake each side of your donut in the bowl of pre mixed cinnamon sugar.  See images below. 


xx

Saturday 8 March 2014

How To Make Your Own DIY Bamileke Inspired Juju Feather Headdress Hat

I posted about my Juju Hat obsession back in 2012 but never saved enough pennies to buy my own. While I would have absolutely love the real thing, $600 for the large sized version I'm after wasn't an option. Fortunately for me my newly created instagram account lead me to a brilliant, inspiring and crafty stylist who made her own. I was obsessed from this moment on, make my own Juju Hat = GENIUS!.


I firstly set about googling to find others who have diy-ed their own - Love Maegan, Vintage Farm Furniture and Katrina From The Block were some of the tutorials I used to get an idea of how to tackle this DIY.

Here is the Vintage Movement DIY pictorial Juju Hat demo...

To make a 60cm or 23" Juju style headdress you will need

Strung feathers - I used approx 3.6m or 4 yards (2 of white and 2 of burgundy)
Card board or backing board
Marking pen/ texta
Scissors
Hot glue and glue gun


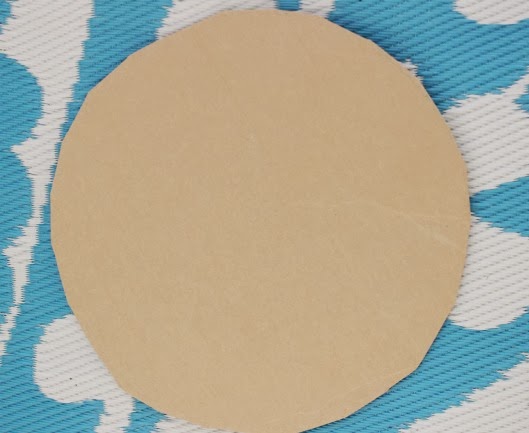
Step 1. Find a round platter, bucket or mat to trace around with a diameter of about 35cm. Trace around and cut out the circle.


Step 2.
Taking our strung feathers and glue gun place glue dots around the edge of the circle and apply the feathers to the outer edge as seen in the image below.


Step 2.
Snip the feather string once you have covered the entire egde of the circle with feathers and then make a loose circle with the remaining feathers inside the circle as shown below - this will give you an idea of where to place and glue the next row. I spaced the row about 1 or so inch apart (you can make your rows close together or spaced as wide as you like). Then glue the second row.


Step 3.
Now continue with your third row of measuring and then gluing. For me this meant switching to my darker feathers. As these feathers were slightly curved I chose to glue them curve side curling up.


Step 4. Final step
To cover up the inner row and ribbon edge simply curl a small section of feathers and glue to fasten. Then glue this to the center over the final round row/ring.


xx

Thursday 6 March 2014

Mid Century Scandinavian Inspired Deers

Another day another vintage shopping spree only this time it was lead by my hubby... a nice change. On a random Ebay hunt we stumbled across this set of Deers and he was taken, so we had a bid.


I think they are fabulous... I love the lava like paint work. The pair measure about 30cm tall and 15cm wide. I think they will make a fabulous vintage Christmas feature too!.


Retro kitsch to the max
happy thrifting
xx

Saturday 1 March 2014

DIY Painted Triangle Pot Plant & Fiddle Leaf Fig

I have finally joined the Fiddle Leaf Fig crew! Having spotted and fallen in love with these indoor plants on pinterest I finally set about trying to find a well priced version for my home which proved to be harder then anticipated. There is something so wonderful and healing about indoor plants and the Fiddle Leaf Fig aka Ficus Lyrata is definitely a beautiful way to bring the outdoors in. After many phone calls and hours of internet searching we finally found a tree at a suburban nursery in Melbourne - the kind of place that may not be aware of the trend which meant availability and a fairly decent price.


The perfect plant needs the perfect pot and I knew my parents had a few unused glazed pots hanging around their yard so we chose one and set off to grab the potting mix and paint.

The plant we purchased had a number of stems in the pot so my hubby separated the plants and reserved two large stems for our pot... I have to keep reminding myself that it will grow in time and look as fab as the larger versions online!.

I adore the fiber glass triangle painted pots you see popping up on design blogs and in homeware stores and my hubby and I decided to DIY our own. I should say he did the hard work, I did the painting and coffee making... so here is our painted triangle DIY.


You will need:

Painters Tape - we used 3m green tape (Similar to frog tape)
Ruler
Measuring Tape
Marker (to dot your points)
Calculator (I know right - boring!!)
Small pot of paint in your chosen colour
Stanley Knife

Step 1.
Decide how tall you want your triangles. We chose 10cm approx 4" triangles with an 11cm base. Our pot is about 35cm high or 13.7".

Step 2.
When you know how tall you want your triangles to be mark around the pot to this length. Then place a piece of tape around the pot at this length (see image below)


Step 3.
Now measure the circumference of the pot and based on the width you would like your triangles to be work out how many you can fit around the pot by taking the circumference measurement and dividing by the width of each triangle (Our pot had a circumference of 110cm and we fit in 10 triangles at 11cm wide each). 


Step 4. (see images above)
The best way to get an even triangle is to mark two points around the pot as guides. The first is your triangle width as organised in step 3. We chose 11cm so the first step was to measure and dot out 11cm right around the pot where you have placed the tape. Then mark out the half way point on the top side of the pot to help you locate the point of each triangle. That is the measuring and marking done now to the taping.


Step 5.
Using your marked dots as a guide run the outside edge of the tape from the mark at the belly of the pot to the mark the top lip of the pot. 

Step 6. Using your stanley knife cut away the overlapping tape as shown below

Step 6. Continue placing the tape and cutting away the excess.


I was head coffee maker and baker while the taping was being done!

Step 7. 
Now your are ready to start painting. I chose a water based paint as I find it doesn't seep as much through the tape therefore leaving a nice crisp line. I applied two coats of paint 


Step 8.
Once your paint is dry gently remove the tape and enjoy!

FYI we inherited the pot with the paint splotches!


xx
Enjoy!