Wednesday 25 July 2012

Sunburst Mirrors - Whether Antique or Reproduction I Love Them!

Here's a reproduction vintage style sunburst mirror I purchased recently... I know they have been done and done again but I adore a good mirror and have always been obsessed with sunburst mirrors!.
A missed Ebay purchase two years ago still haunts me to this day... I foolishly passed up a vintage Mexican Sunburst Mirror as it had to be sent via courier and I thought it would be too expensive!!!! Silly, silly me, it only had to be couriered from NSW Australia.
 For those who have ever watched Sex in the City, an exact copy adorned the wall above the mantel in Miranda Hobbs Manhattan apartment... and I passed it up!!!


This is the exact mirror I passed up as seen here in Miranda Hobbs apartment!


Miranda Hobbs Apartment

The History of Sunburst Mirrors
The Sunburst Mirror is believed to have originated in France ... two popular theories is that Louis XIV of France, after playing the role of Apollo, God of Sun, in a ballet later adopted the Sun to represent the royal family. Some believe this is where the Sunburst mirror eventually originated... many historians believe Sunburst mirrors actually originated during the French Revolution when Sunburst style Halos were taken from Church's ... as time progressed these Halos trickled down into the Antiques Market, purchased by collectors, who transformed them into Mirrors - Up-cycling genius!

Antiquaire Online

Country Living Magazine

Wherever they are hung, Sunburst Mirrors add depth and focus to a room... Over a dressing table, mantel or adorning your hallway walls they are definitely a mirror to consider.

Wednesday 18 July 2012

Vintage Star Chinese Checkers - from board game to art

A thrift store buy, this antique Chinese Checkers set is destined for greatness but not as a board game. Instead I'm going to frame it work and hang it on the wall.


To create the artwork I'll hot glue the balls to the cardboard backing and then glue the board to its box, unlike other framed board games I want to display the entire set as one framed artwork. I'll have a piece of hardboard cut to the size of the box and will glue it to the back ... once that dries a simple wire attached to the back, stapled at either end and it will be ready to hang!. This will be a great vintage DIY artwork project!


 Wood framed check board.

Monday 16 July 2012

Hippie Hooray - DIY Vintage Ethnic Inspired Pom Pom Rug

This is an amazing DIY craft project ... I stumbled across this DIY Pom Pom rug by Free People, originally created as a shop display item and had to post about it immediately. 

It's part tapestry, part macrame, part ethnic inspired MAGIC! Best of all Free People posted this tutorial to help you make your own at home.  


rugrope1.jpg

Hand spun rug magic!

rope-swirl-display-9
Free People DIY How to here
Image source Apartment Therapy courtesy of Free People and Free People
created at: 08/29/2011
DIY Vintage Pom Pom Rug - Image courtesy of curbly
rugrope2.jpg


This rug would make an amazing art work for your walls, the sky is the limit here colour wise and you can add extra embellishments ie bells, beads anything that works.... 

Your basic shopping list for this project is

-Cardboard used as the backing for each rope circle
-Twine or Rope
-Coloured String
-Pom Poms
- texta to mark your pattern on the cardboard

You could also use a rubber rug matt underneath to prevent slipping on floorboards..... Just use an Exacto or Stanley knife to cut the matt where there are gaps in the embroidered discs... always make sure you have a protective backing when using an Exacto or Stanley Knife.


Saturday 14 July 2012

Maxfield Parish Daybreak 1922 - Iconic Print of the 20th Century

I purchased this print a few years ago at auction... it caught my eye instantly and with good reason....it's a vintage Maxfield Parish print of his iconic 'Daybreak' painted in 1922.


Daybreak is considered as one of the most popular prints of the 20th century 'based on number of prints made: one for every four American homes' (wikipedia).

An American painter and illustrator Maxfield Parish, born 1870, was 'known for his distinctive saturated hues and idealized neo-classical imagery.' (wikipedia)

Friday 13 July 2012

DIY Dresser makeovers - from thrift store castaways to designer wonders!

Up-cycling, re-purposing, hacking call it what you will these clever DIY-ers have taken vintage thrift store castaways and turned them into fabulous head turning furniture items. All it takes is a quick sand, a lick of paint or wallpaper and some patience.


Up-cycled vintage dresser... grab 6 sample pots in graduating colours and paint each drawer as seen above found here 

01 10 DIY Furniture Makeovers
Chevron Striped Dresser - pinterest


Gorgeous Up cycled vintage wallpaper dresser - amazing found here 

P1040768

Loving this painted chevron pattern dresser with castors added found here 
Twice Lovely

dresser_after1

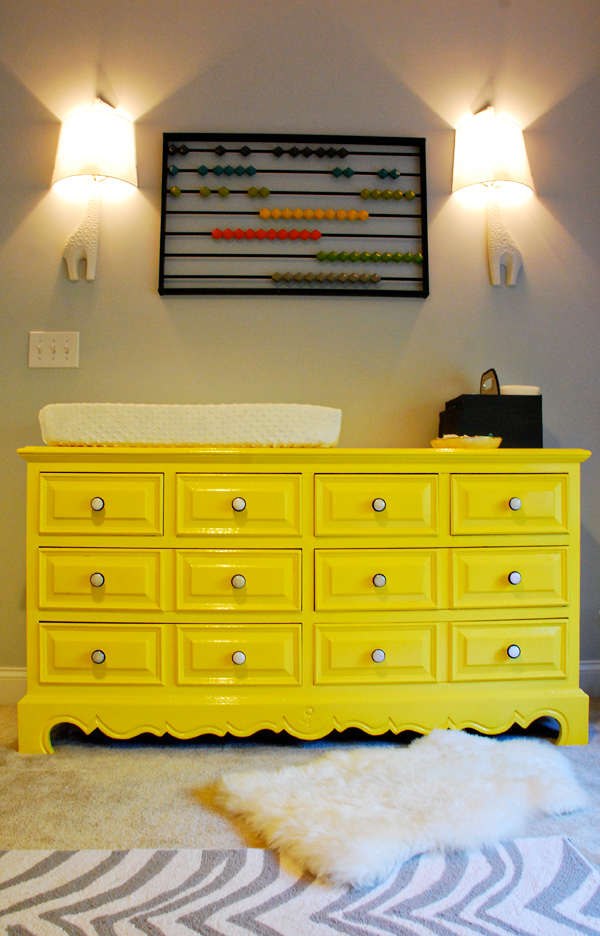
Painted Baby Change Table - An amazing up cycled & re purposed vintage item by honeyandfitz


Fabulous industrial vintage feel by Winder & Main

Painted Dresser


painted dresser

Painted & stencilled dresser - here


I know this isn't a dresser but what a DIY make over!!! From Thirstlewoodfarms this yard stick stool is divine! You can achieve this look by wood gluing vintage rulers either a yard or metre long cut to size (hand cut jagged edges are fine and help to create a rustic look) across the the top of the stool to create a top then vanish to finish. This would also be great for a coffee table top.

Thursday 12 July 2012

DIY Vintage Wedding Table Numbers - Re purpose old frames into fabulous features for your big day!

DIY Vintage Frame Table Numbers article photo

A brilliant DIY craft idea for the prospective Bride, these vintage inspired wedding table number centrepieces will delight your guests and double as a collage artwork/ keepsake when the day is over. I wish I'd stumbled across this tutorial for my 2006 celebrations.... 

You will need assorted vintage frames depending on your table numbers... you can use old or new frames in varying sizes and designs - Flea Markets, Opp Shops, Thrift Stores and White Elephant Stalls at school fetes and fairs are a great way to obtain vintage frames. Try to mixing it up buying some frames with a gilded design and others with wooden bevelled painted edges in round, oval, square and rectangle shapes....

Choose papers in varying patterns to suit your theme.... florals, polka dots, candy stripes and flocked patterns are all good options... as you will see, in the images provided, the papers chosen are all vintage inspired muted pastels tones... when choosing your papers grab swatches and group them to ensure they work together and suit your theme - see image below. 

For the numbers you can be as creative as you like mixing it up and using vintage or vintage inspired numbers in varying shapes and sizes according to your frame size. Craft stores have wooden numbers you can paint and use or you may be lucky enough to come across some vintage numbers at thrift stores and fairs, you can also simply print and cut out paper numbers.

When your big day is over you can create a collage art work keepsake by hanging the table number frames on your wall. Putting a few wedding pics into the mix will also look fantastic so buying a few more vintage frames for this purpose would be a great idea.


DIY idea by Project Wedding 

You will need a glue stick, PVA ( for gluing wooden numbers if using them), frames, papers

1. Cut the papers to size using the frames back board as your guide
2. glue the paper to the back board
3. Using tacky glue or PVA glue your wooden numbers to the centre of the paper within the frame and leave to dry.


Wednesday 11 July 2012

Vintage Retro Toy Skiing Wolf Fox ?? Incredible craftsmanship from the bygone era

Twilight has certainly put wolves back on the radar.... in the 90's we were dancing with them, in the 80's Michael J Fox was turning into one and according to the this vintage find sometime in the 60's/70's we were skiing with them!!!! 

This gorgeous flea market find is one of the cutest vintage novelty items I've seen... He stands at about 60cm tall and wears a corduroy pant and jacket, striped ribbed socks and a turtleneck.

I love the attention to detail here, this kind of quality is rarely seen in mass produced modern toys which are full of machine made synthetics and plastic. 
He would certainly make a kitsch mantel piece Christmas decoration!


Now to name him??? Harold, Arthur, Jacob II hmmmmm.........

Tuesday 10 July 2012

DIY Leopard Print Hi-Top Sneaker Cake Tutorial - 80's vintage cake fun!


So this month was cake month in my house with my niece and nephew's birthday  (hence the double cake tutorials!).

My niece chose a Vintage 80's inspired Hi-Top Sneaker Cake for her 15th and I found it hard to find a tutorial online so here is my brief "how to" .... hope you find it handy!  


The shaping, buttercream and fondant process


Adding the details


Adding dimension, shape and details


Painting the spots


As you can see I then added edible glitter to the tongue, green shoe laces and vanilla cupcakes to finish... overall I was very happy with the result... I would probably like to work on the shoelaces next time, they could have been better, but I simply ran out of time.

Monday 2 July 2012

Thomas The Tank Engine Cake - children's birthday fun!


This year I decided to make my gorgeous nephew a Thomas The Tank Engine birthday cake. Due to a nut, egg and seed allergy in the family I made the fondant and cakes from scratch... below you will find instructions from moulding the cake shape and butter creaming the outside to adding the fondant and the face. 

I was a bit slack with the finer details, as you will see there are some creases in the fondant and knife marks, but overall the cake was a hit with the kids!

If I were to create another Thomas cake I would round out the top section of the engine instead of leaving it square.


Cut and shape the cake using butter cream frosting as your glue


Making the face - adhere the face to the head piece using fondant and water creating a sticky adhesive.